
Ok, back to the planner idea.
I scoured the internet - I wanted something simple and free to make. And I found some AMAZING printables. They were super simple (there are some great ones out there that are just way too complicated for where I'm at right now). They also end up making a book that's only 5.5" x 8.5" so it fits in my purse better just in case I'm hit with inspiration at the grocery store.
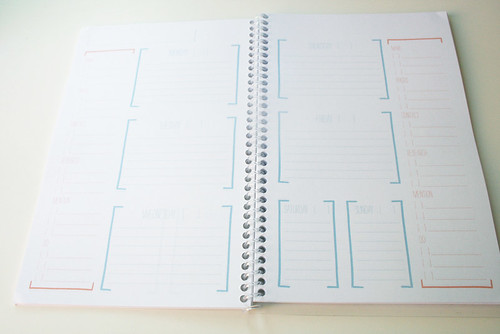
Here's my finished planner - whatcha think???

Granted, it's not perfect, but I love it. Kind of hard to read the title in that picture, but it says Jane's Girl Designs and then below "a blog planner."
Here's how I made it:
(1) I found these awesome printables (as mentioned before) on pinterest:
Here's the link to Wild Olive where you can grab the printables in color or in black and white: http://wildolive.blogspot.com/2011/07/print-blog-planner.html.
I printed mine in black and white to save money, but the color one is so cute!
So I printed them off double sided (make sure to line them up correclty on your printer) and made enough for a year's worth of blog planning. Once I had them all printed I chopped them all in half with my paper cutter so that they would make a book.
(2) I wanted to do something simple for the binding (cost effective and I wanted to be able to add more sheets as I went) so I just opted for some binder rings I had laying around. I three hole punched all of my sheets and then used the binder rings to hold it all together. I adjusted my three hole punch to fit my 8.5" side better than the normal 11" side. If you can't adjust your three hole punch easily, then you could always use a single hole punch (but that may take a bit longer).

Sorry the picture is kinda crappy...but you get the idea.
(3) For the cover and back, I just cut some chipboard the same size as my sheets and three hole punched it as well. Once I had my chipboard cut and punched, I decided I'd try something a little different to decorate it. So I grabbed my burlap, freezer paper, and turned on my iron...
I ironed the burlap scrap onto a piece of freezer paper (put the freezer paper down on the ironing board first shiny side up, then lay the burlap over it (so the shiny side of the freezer paper is up against the burlap) and iron - be careful not to let you hot iron touch the paper unless you want a gross gooey iron). It takes a bit of ironing, but eventually your burlap will adhere to the freezer paper. The freezer paper stabilizes the burlap so that you can...
PRINT ON IT!
That's right, print...on burlap. You just run it through your ink jet printer and it prints. I've had better luck with this in the past - I was in a bit of a hurry for this one so it didn't print out perfectly, but I still love it. My printer is old, so I've been ok printing on burlap with it, but I probably wouldn't recommend doing it with a really nice new fancy printer. Because, you're still putting burlap in your printer. It's like asking for a printer jam.
Once I got it all printed out, I cut out the portion I printed. Then I attached it to my planner with little vintage looking brads I had.

And that's about it. I'm not sure how long the burlap will survive getting thrown around in my purse without fraying too much. I did make sure to put the brads far enough into the burlap to allow for some fraying...

It's simple and rustic...and I think it will work great.


No comments:
Post a Comment