Pages

Sunday, March 18, 2012

My Happy Place

This has been a really productive weekend for us, which is much needed!  Yesterday I picked up Chris' wedding band from the jeweler, we got our engagement pictures taken, and we registered at Target.  So...not too shabby.  It was super windy for the pictures but our photographer is awesome so I'm sure we got some good ones in there.  Oh...and we had Chris' wedding band sized for him, and now it's just a wee bit tight.  SOOOO, he has to go to the store this week while I'm at work and see if they can stretch it to get it to fit, or figure out some good alternative...yikes!

Yesterday, while it was windy, it was still a nice day with bits of sun.  We've had our windows open while we enjoy this weather, which made me realize just how nice our dining room looks!  I moved in with Chris last year and we very quickly realized that we had 4 couches, 3 dining room tables, 4 queen size beds...you name it, we had it in triplicate.  We had a massive garage sale and sold all of our older furniture so now we have a nice mix of his and mine.  However, the dining room is the only room (so far) that we've decorated together.  I took a few pictures yesterday because I just LOVE how it turned out...


You can see Ludo's tail in the lower left hand corner...it's pretty impossible to get a picture of this room without getting a pet in the way.  Petey was getting a pedicure at the vet, otherwise I'm sure he would be in all of them!  Anyway, we picked out all of this awesome furniture together from World Market when they were having a huge sale (something like 50% off all furniture).  We went for the mix and match to liven it up a bit.


The wing-back chair is my favorite (I just noticed Ludo is once again in the picture).  The chair is pretty big though so we just went for one..but I love the pattern and the unexpected nature of having this kind of chair at a dining room table.


I also love the sweet little yellow patterned chair.  It's super feminine which is a nice touch in an otherwise very masculine room.


I love the shape of it and it's pretty comfy too.

I made a centerpiece out of a bunch of our antique finds and some hand me downs.


I found the old scale at an antique store for $7 and the two candle holders are supposed to hold canning jars - I think they were a couple of bucks each.  I LOVED the watering can and plan to use it (along with the scale) as wedding centerpiece items.  The smaller daisy churn is on loan from Chris' mom, while the large one is something I picked up.  Finally, the cookbooks were my great aunt's...they look great on the table and it's nice to have something from family in the mix.

Here's a few close ups:


We decorated the walls with some other antique store and craigslist finds.  Including...


A parking meter I found on craigslist and decided I NEEDED to have.

 
Another thing I fell in love with...that Chris had to figure out how to hang on the wall.  I love the fact that it's rusted and beat up.


A rusty old mailbox.


Chris found this old picture of a military unit (or whatever they are called) at a garage sale.  It was in a broken, cheap frame so they only wanted $15 for it.  We re-framed it ourselves with supplies from Michaels and now it looks awesome!


And we had these old pictures of Leavenworth, Kansas that look nice in here. (oh and I tried to take a picture without my reflection...but eventually gave up and figured it would work).

Well I know this isn't at all a crafting project...but it's my favorite room in our house.

It's sunny outside, KU is playing tonight ROCK CHALK, and I've almost completed two family birthday boards to add to my Etsy page.  So...I'm done blogging for today.  Enjoy your weekend!

Tuesday, March 13, 2012

Etsy is Up and Running!

As promised, I've opened my Etsy shop back up...VERY slowly though with just one item for sale.

Check it out!


I've had SO much fun making these little wristlet keychains.  I made one for myself a few days ago and I've fallen in love with it.  First, the fabric is all Amy Butler because she's my favorite and can't seem to do wrong in my eyes.  It's actually two coordinating fabrics - blue and gray on the outside and then the fabric on the inside also has pops of orange.  I've been using mine non-stop and found it's super convenient.  They're $5 each which really just covers materials, my time, and the burns on my fingers from the iron!

I've made six of these bad boys so far...all the same fabric.  I'll have to head back to my favorite fabric store to get some more Amy Butler this weekend (it's 45 minutes away and rarely open after 5 during the week...hence the weekend trip).

Oh, and by the way, you can find my Etsy shop at http://www.etsy.com/shop/janesgirldesigns.  I need to re-do the title bar thing and still need some more inventory, but it's a work in progress!

I need to work on some other things for my Etsy shop at some point, but I'd also like to decorate my stand mixer.  Oh, and I made a cute apron right before Thanksgiving that I'd like to post on here too.  Decisions, decisions...

For now I think I may just got plop down on the couch and eat some more cookie dough out of the tub my fiance got from work.  Very healthy.  Gotta look good in that wedding dress ya'll.

Sunday, March 11, 2012

Perfect Rainy Day

Today is one of those gross, rainy, kind of cold but not cold enough for a heavy jacket, kind of days.  Which I LOVE because it's a great excuse to stay inside and craft to my little heart's desire.  I wish that I would have stayed in all day but this morning I went to JoAnn's, then to a different JoAnn's, then to Michaels, then back to the second JoAnn's, then to Home Depot.  Phew...I'm worn out just thinking about it but it was all quite necessary and in the end I got (almost everything) that I wanted/needed for some new projects.

Speaking of projects, I love what I created once I got home!


These are meant to be for our wedding in September.  We're going with a rustic theme for the reception (we're having it in a barn) and nothing says rustic like burlap and mason jars.  But I'm really loving the look of them and already trying to figure out what to use them for once the wedding is over!

So..here's how I did it:

Materials:
 - burlap
- black acrylic paint (you can use fabric paint but I didn't have any of that around so I just used regular black craft paint)
- sponge brush
- 4" stencils (I picked mine up at Home Depot.  I looked at JoAnn's but theirs were all pretty frilly looking and I wanted something more basic and simple and Home Depot had the perfect ones near their mailboxes and house numbers.
- wide mouth quart mason jars
- hot glue (because what project is complete without hot glue?)

I started by cutting my strips of burlap so that they were wide enough that the number would fit on them, but not so wide that they'd be taller than my jars.


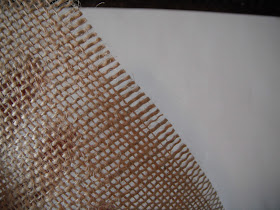
Then once I had the size I liked, I frayed the top and bottom a bit by pulling off a few of the horizontal strings on the edge.  They'll probably come off anyway and it gives the edge more of a rustic feel.


Once I had my burlap all lined up, I centered my number stencil and started stippling the paint on with my sponge brush.  I played around with this for a bit and realized that I like it to look not perfect - so I didn't use a ton of paint and didn't paint every bit perfectly or evenly.


See, not perfect by any means...


Then I used my hot glue to adhere the burlap to the mason jar.  I found that tacking the burlap in the front to keep your number center, and then tacking it to the jar the whole way around really helps to make it a little more solidly attached.


I ended up making 15 jars because we should have 15 tables at the wedding.  I figure, in the meantime these bad boys can decorate the house.  Pretty simple and just the look I wanted...


In other news..I'm thinking of reopening my Etsy shop after much encouragement from friends and family.  I'm not quite sure what all I'll put on there yet, I may use some Facebook reactions to get an idea of what would sell and what only I really love.

Monday, March 5, 2012

Family Birthdays - a Pinterest Project

Well I've been eyeing those family birthday charts that seem to be floating around on Pinterest and have finally decided to create my own.  So this weekend, thanks to Chris' help drilling all of the holes, I finally finished this project.  I think it came out pretty great!


After taking the picture, we were able to get it hung on the wall and it looks fabulous!  It was a great chance for me to use my Cricut and vinyl too. 

I've been looking at these on Etsy and I've found some that don't seem quite as polished going for $50 and up.  I think that's a fair price for the amount of work that goes into them.  So what are your thoughts?  Would you buy something like this for $50???

So Many Little Pieces!

I really have been busy over the last month with a number of projects and life, of course.  And here's a big one that I finally tackled in February...embellishments on my dollhouse. 

Let me start by addressing the obvious...yes I am 29 years old and building a dollhouse.  And while this may seem weird (which it probably is) let me just clarify that I grew up with my granny have a beautiful, wonderfully detailed dollhouse.  She sold it in a garage sale (tear...wish I would have known she was selling it) but then decided to purchase a kit to build a new one.  Well since purchasing the kit she's had some health issues and decided to move into a smaller apartment and take on less projects.  I am so much like my granny, it would be quite concerning if she wasn't such a badass.  For instance, my granny would always go shopping with us and if we found something we really liked she'd say "oh don't buy that, I can make that."  Since becoming an adult (which is a stretch) I've found myself frequently saying the same thing.  I don't have kids, so usually I'm telling my fiance "can you believe they are selling this for $50, I could make this!" 

Well another wonderful trait of my granny was her extensive collection of crafting supplies and her desire to start a million projects and have them all going at the same time.  Now you know where I get it from.  Anyway...when she decided to move she had this wonderful dollhouse kit complete with a barely started dollhouse (we're talking just the base) so I stepped in and adopted it with the goal of finishing the dollhouse within the next few years to be able to show it to her. 

I adopted it about 6 months ago...and I've pretty much been kicking ass on it ever since.  I hit a few lulls, like when I had to shingle the roof and nearly lost my mind, or when I decided to put electrical in it and then freaked out that I was going to burn it down.  Well one of those lulls was finishing all of the little decoractive railings on the outside of the house.  That was until February when I attacked it like a beast and went to town on railings.

First...let me show you some of the pieces I was working this (so you can understand why I avoided it for a while).


Those little bitty dowels were about half the size of matchsticks.  Oh and everything comes in natural wood so to paint it you have it (1)sand each piece, (2) paint each piece, (3)resand each piece, (4)paint each piece a second time.  It took about a week just to get it all painted in the evenings after work.

Then I had to glue them and try to get them all lined up as evenly as possible before attaching them to the house.  But look..it came out so good!


I'm taking my time with this little house so that it will really be a family heirloom passed down to my kids and grandkids.  If I have all boys then one of them better like dollhouses, dammit.  But so far it has electrical (which I can have pictures and explain on a later date) and wallpaper, and now lots of little details and railings on the outside.

Oh, and one of my favorite things is the table it's on.  Chris made it for me - we grabbed a pre-cut sheet of Plywood from Home Depot (don't tell my grandpa I went to Home Depot..he hates them after a very bad experience and we can no longer utter the words Home Depot in front of him, true story) and then some pre-manufactured legs (about the height of a coffee table).  I also got a small chunk of astro-turf that we glued on the top.  Then Chris trimmed out the table top and we attached the legs...and now I have a really nice place for my dollhouse to live!

See...and you thought I've just been slacking over the last month and a half.

Remember that one time...

that I didn't post on my blog for over a month???  Yeah, me too!  Here's the deal, our internet at home sucks sometimes and I got super frustrated and completely gave up (after trying to upload the same blog post over a dozen times one morning).  But, I'm back!  I've decided to change the direction a bit, because I came to the following realization.  I could make 300 projects, but a lot of them would suck and be lame and end up going in the garbage and being a huge waste of money.  Don't get me wrong, I've been crafting up a storm, but certainly not 6 projects a week.  So, instead of a daunting race to the finish line, this blog is just going to be an at my own pace look at how I spend my free time.  So, mostly crafting projects, the occasional wedding planning entry (which will also be a craft project) and then probably some pictures of my dog, Petey, and our two cats.  So...here's to a new direction and new motivation to keep the blog alive.
Happy Crafting!